Manually Removing AMD GPU Drivers from macOS
The manual approach to completing the 2011 MacBook Pro GPU fix — remove AMD drivers from macOS for a fully stable normal boot. This process will be automated in MacGPUFix+ future releases.
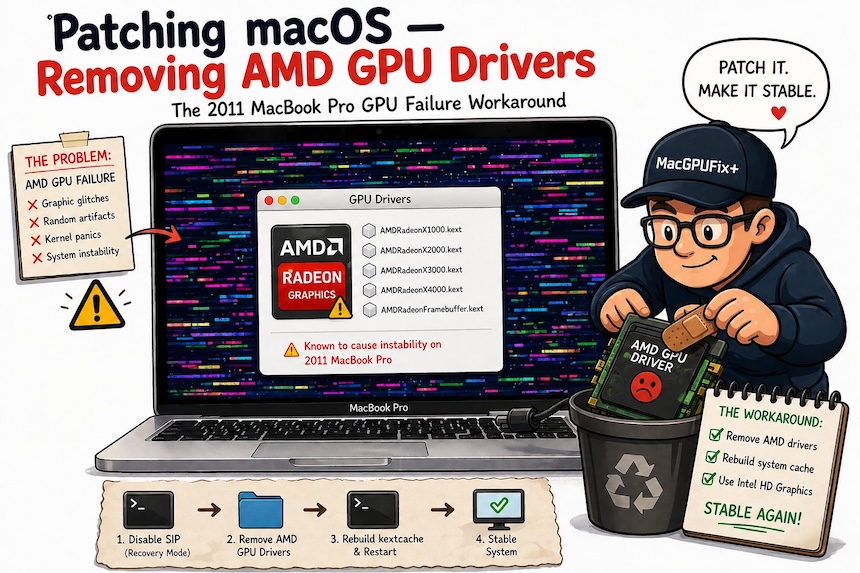
Who this is for: MacBookPro8,2 (15-inch Early 2011) and MacBookPro8,3 (17-inch Late 2011) owners who have already applied the EFI fix and want a fully stable normal boot without Safe Mode. Your screen must be working before starting — boot into Safe Mode first.
macOS ships AMD GPU driver files (kexts) that load on every boot regardless of the EFI fix. On a patched Mac these drivers find the GPU disabled and can cause instability, crashes, or kernel panics under load. This guide removes them permanently using dosdude1's macOS patcher — an independently maintained tool we reference with full credit. MacGPUFix+ future releases will automate this entirely from a single USB boot.
What You Need
- MacBookPro8,2 or MacBookPro8,3 with the EFI fix (Part 1) already applied
- A working display — boot into Safe Mode first if your screen is unstable
- Internet connection to download the patcher
- 20–30 minutes uninterrupted
- Time Machine backup strongly recommended before starting
About SIP — Read First
SIP (System Integrity Protection) locks critical macOS system files against modification — including by administrator users. It protects against malware and accidental damage to core system components.
The AMD GPU driver files (kexts) live inside SIP-protected directories. No tool can remove them while SIP is active — not even as root. We must disable SIP first, remove the drivers, then leave SIP disabled.
Boot into Recovery Mode
Recovery Mode gives you access to Terminal where SIP can be disabled. There are two ways to get there.
Shut down completely
Apple menu → Shut Down. Wait for the Mac to fully power off — not restart.
Boot into Recovery Mode
Method A — Internal Startup Recovery:
- Press power button
- Immediately hold ⌘ Command + R
- Release both keys when the Apple logo appears
Method B — Installer USB:
- Connect your macOS installer USB drive to your Mac
- Press the power button and immediately hold Option ⌥
- Select the installer USB from the boot picker.
Select your language
A language selection screen appears. This is normal — you are not installing macOS. Select English or, the language you prefer to work with and click the arrow button at the bottom to continue.
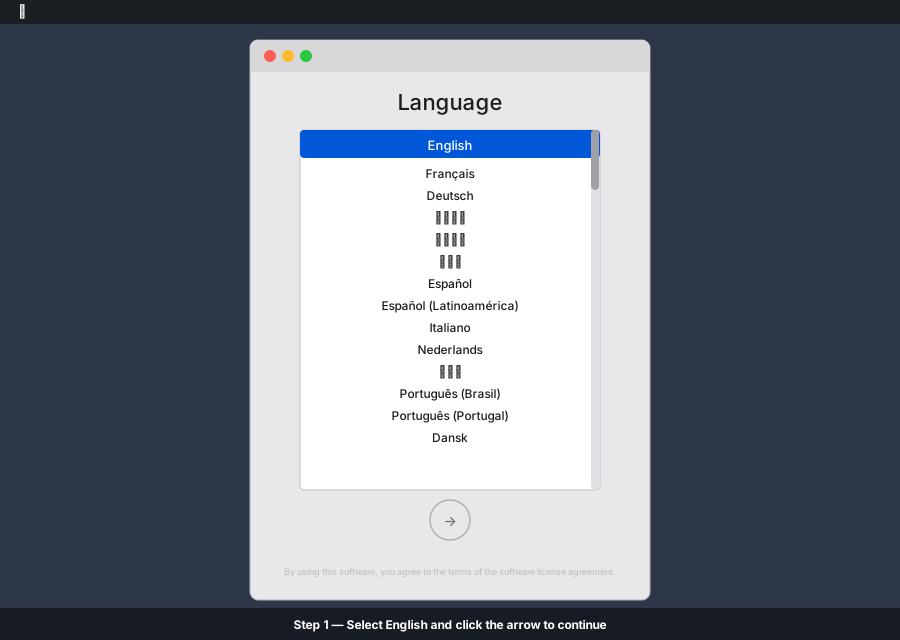 Select English, click the arrow — you are not reinstalling macOS
Initializing the macOS Terminal
After selecting your language of choice, a window with the following four options including Reinstall macOS and Disk Utility displays. Do not click any option and do not click Continue. You will instead look at the menu bar at the top of the screen for the Utilities menu option.
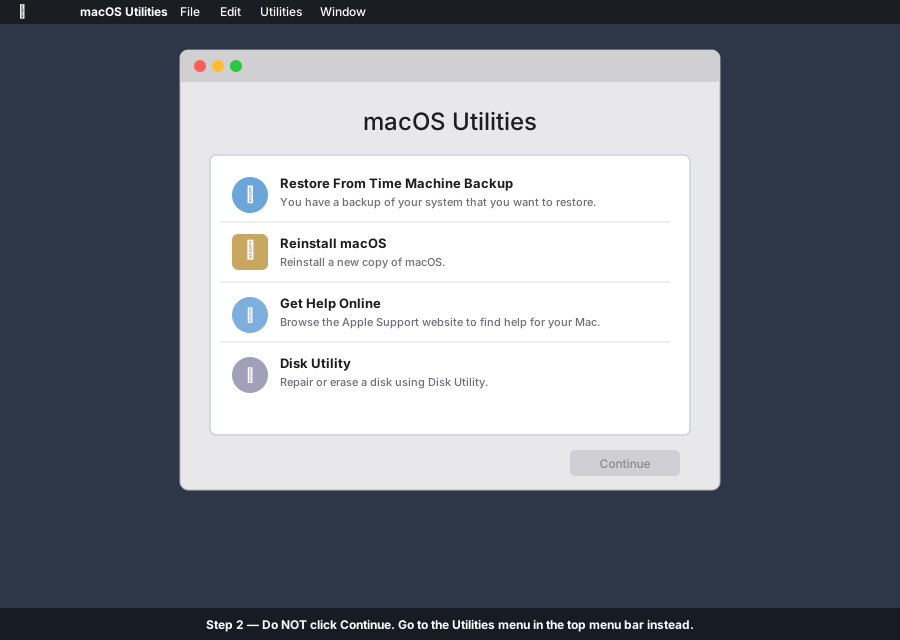 Ignore this window — go to the menu bar at the top of the screen
From the top menu, click Utilities → Terminal.
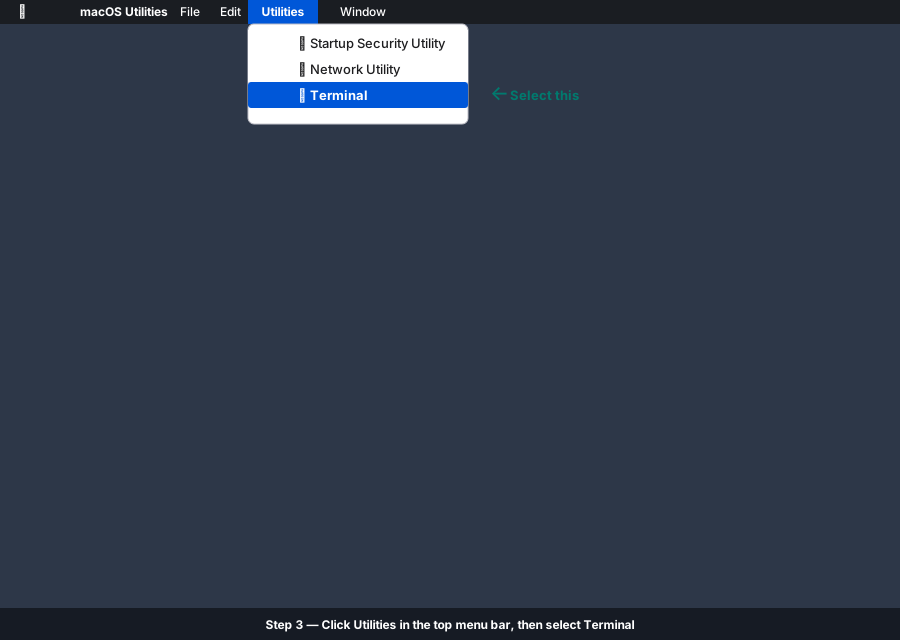 Top menu bar: Utilities → Terminal
Disable SIP in Terminal
Using Terminal to disable SIP
The Terminal may display the following prompt: -bash-3.2#.
For disabling SIP we will need to use the csrutil command to disable it. Type the following in your terminal as shown below and press Return ↵.
-bash-3.2# csrutil disable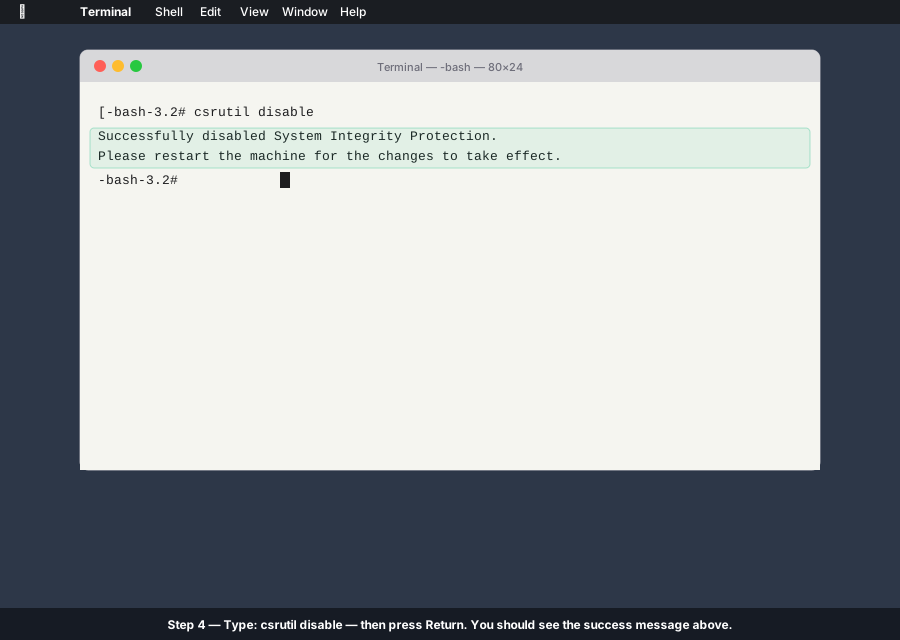 Type this command exactly
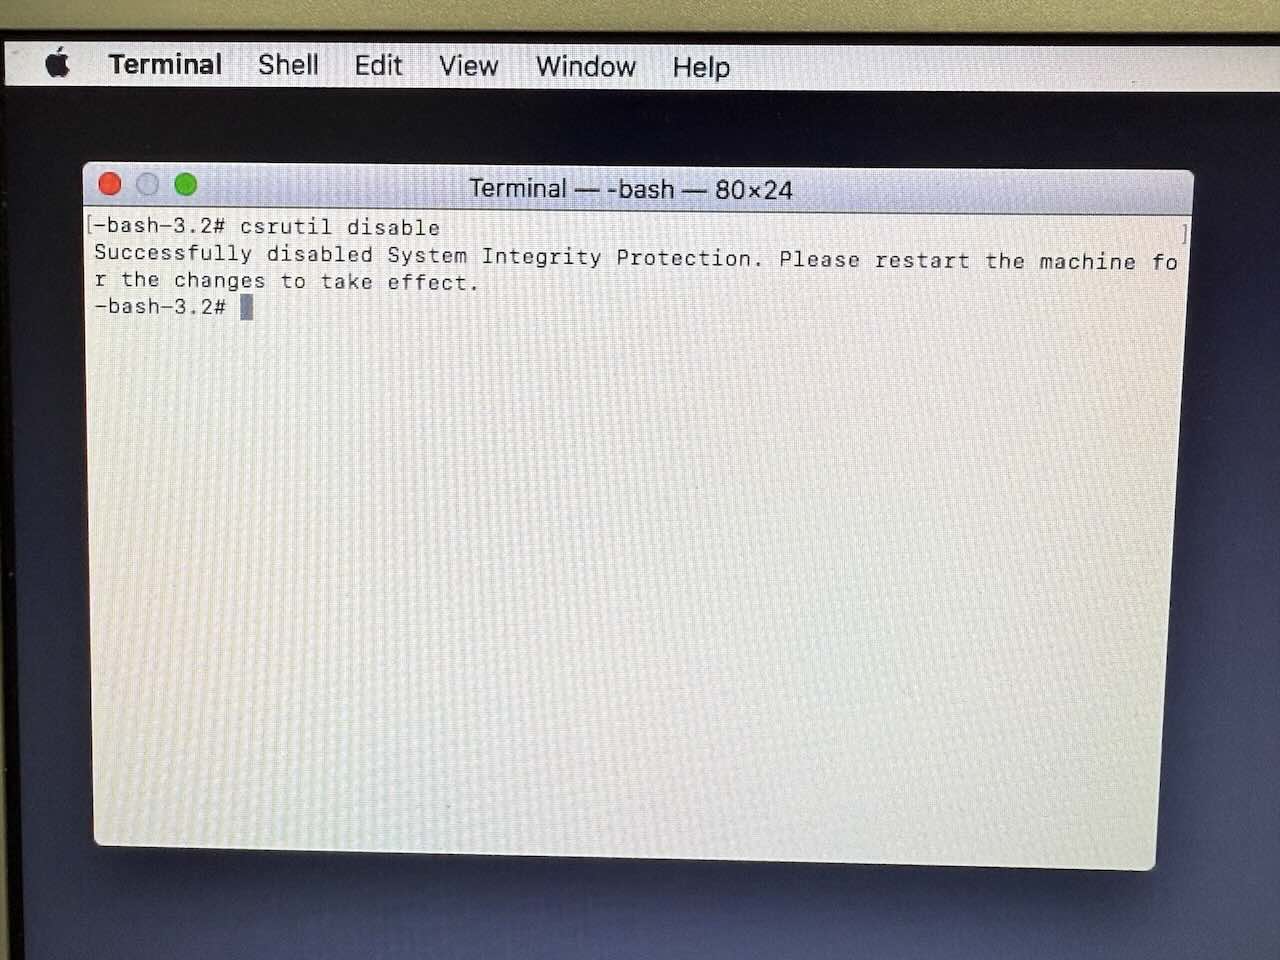 This is what success looks like
You should see: "Successfully disabled System Integrity Protection."
The Terminal also says "Please restart the machine for the changes to take effect" — do not restart yet. Instead, shut down your machine completely and proceed to Step 6.
Start your system in Safe Mode after disabling SIP
Your Mac is not patched yet — the AMD GPU drivers are still present in macOS. A normal boot at this stage will load those drivers and may result in instability, a black screen, or a restart loop. You must boot into Safe Mode.
Safe Mode forces macOS to skip third-party and non-essential kernel extensions — including the AMD GPU drivers — giving you a stable working environment to download and run the patcher.
How to boot into Safe Mode:
- Shut down your Mac completely — Apple menu → Shut Down
- Press the power button to start your Mac
- Immediately after hearing the startup chime, hold Shift ⇧
- Keep holding until you see the Apple logo and a progress bar
- Release Shift ⇧ — your Mac will continue booting into Safe Mode
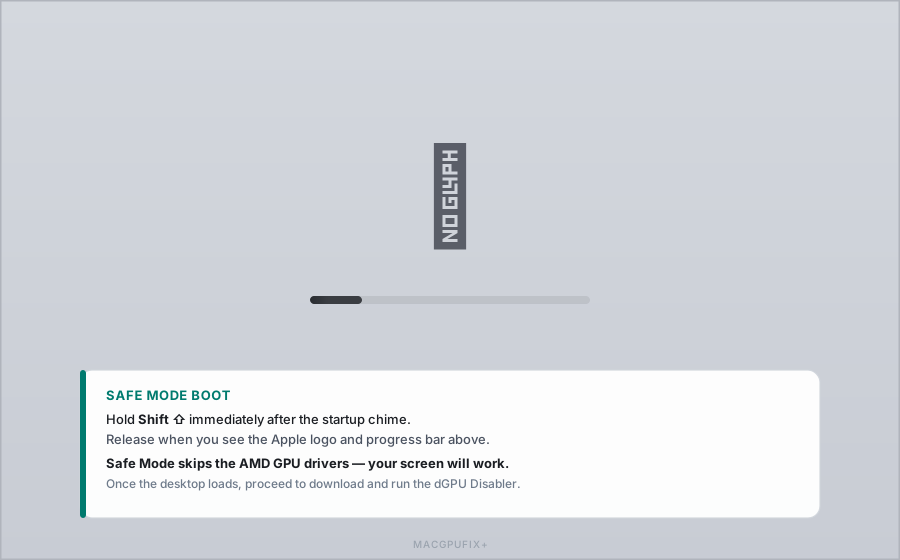 Hold Shift after the chime — release at the Apple logo
Once Safe Mode loads and you reach the desktop, proceed to the Apply the Driver Patch section below.
Apply the Driver Patch
After restarting into macOS, download dosdude1's MacBook Pro dGPU Disabler — a free app that automates driver removal. We reference this tool with full credit to dosdude1. Visit dosdude1.com/gpudisable/ →
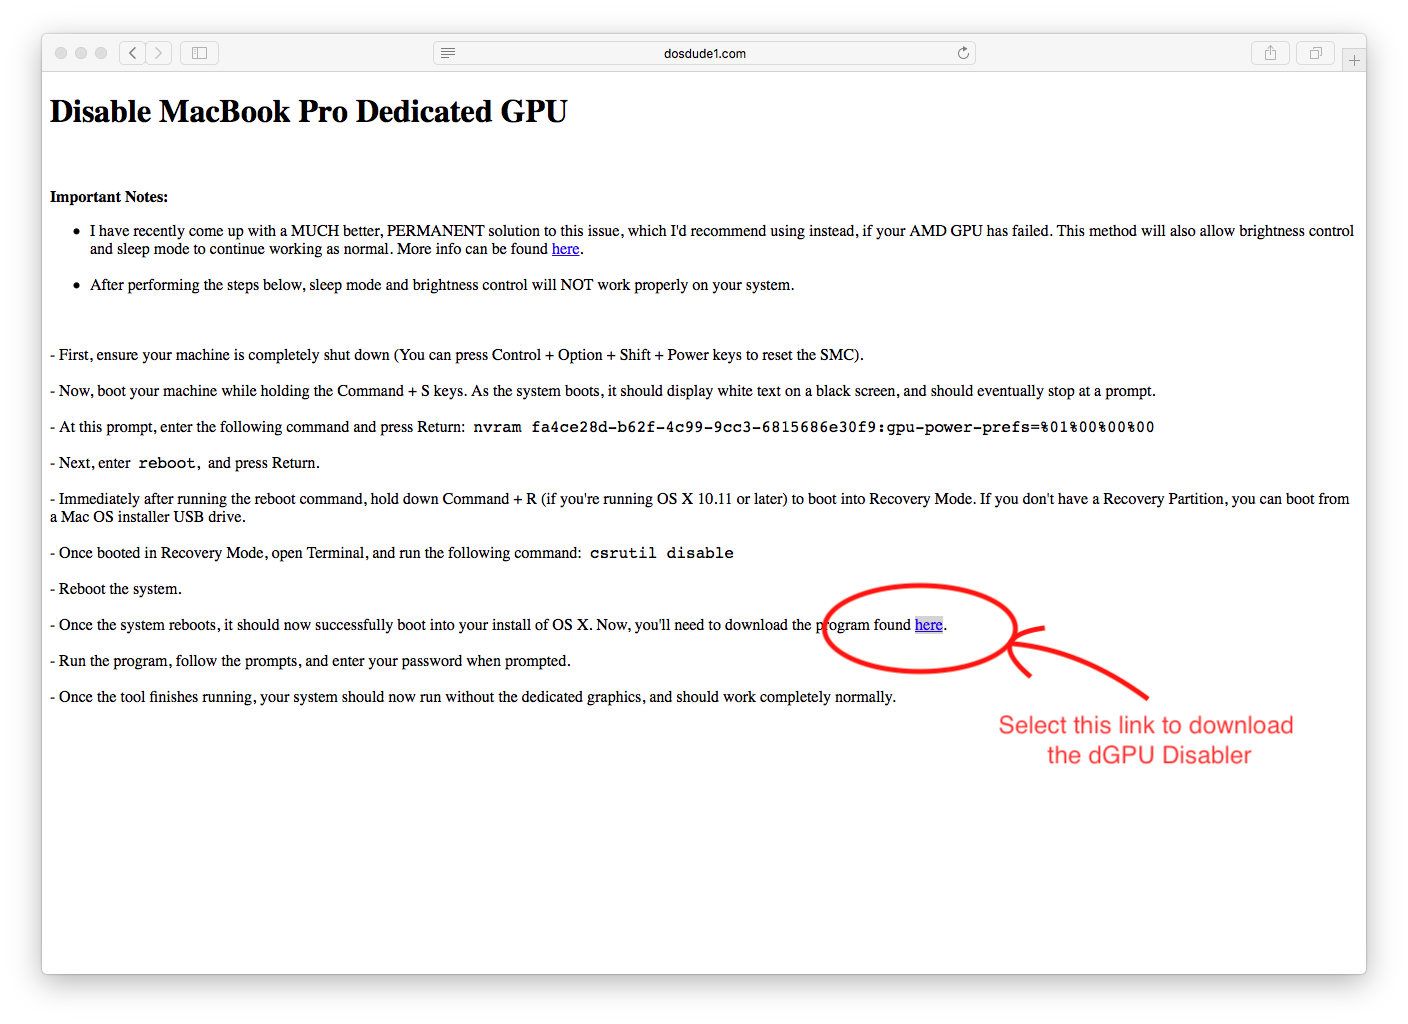 Tap to enlarge — click the circled link to download
Running the dGPU Disabler
Find MacBook Pro dGPU Disabler in your Downloads folder and open it. The app runs in four screens.
Open the app from Downloads
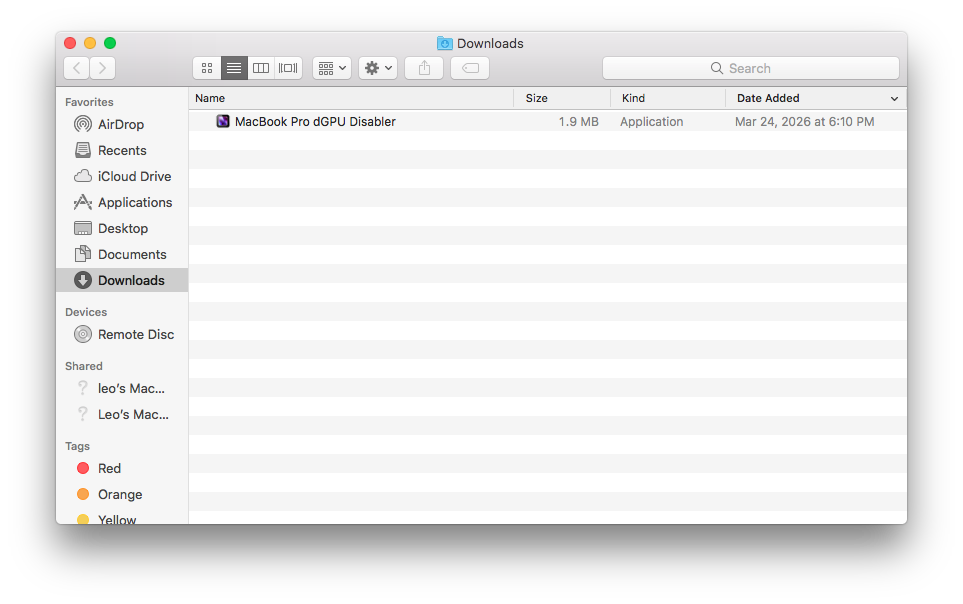 Double-click to open from Downloads
Read the welcome screen and click Next
The app explains what it will do: set the NVRAM variable, remove AMD GPU kernel extensions from /System/Library/Extensions/, and install a LaunchDaemon.
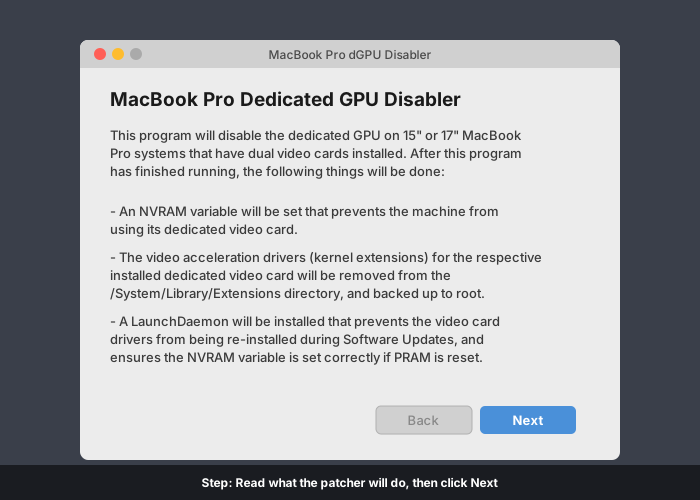 Read this carefully, then click Next
System Compatibility — both must be green
The app checks SIP is disabled and the machine is compatible. Both must show a green checkmark to proceed. If SIP shows red, go back to Disable SIP and repeat those steps.
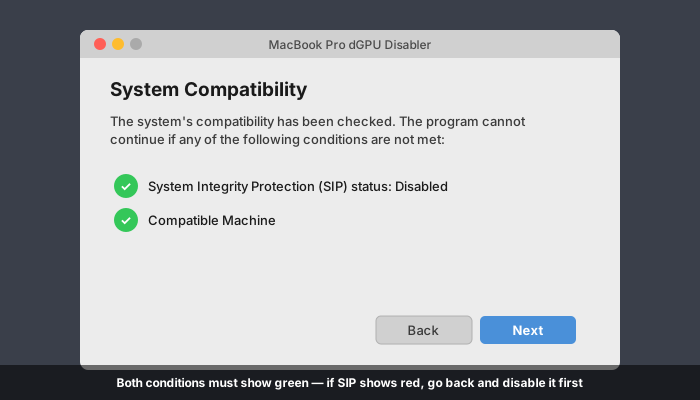 Both must show green — if SIP is red, go back
Review patches and click Next
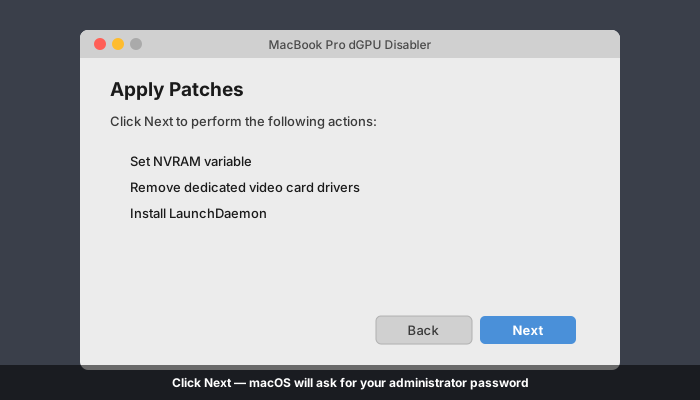 Three actions — click Next to apply
Enter your administrator password
macOS prompts for your password. Enter it and click OK. The patcher modifies protected system directories and needs elevated access.
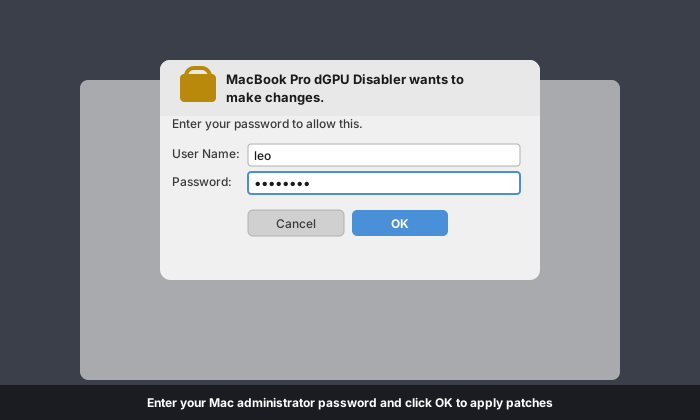 Enter your Mac password and click OK
The patcher runs. When all three items show green checkmarks, click Next.
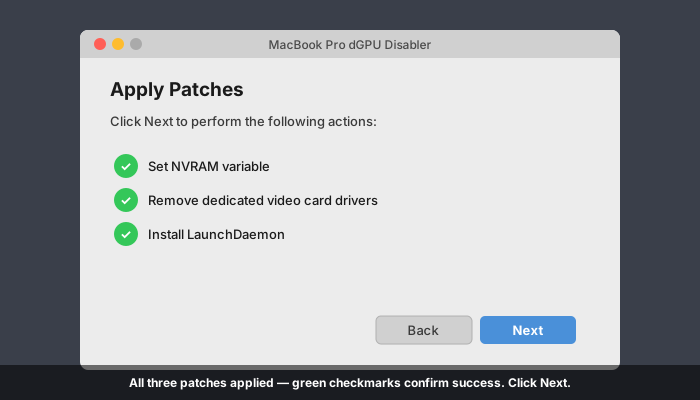 All three green — patches applied successfully
Patching complete — restart your Mac
The Complete screen confirms all patches were installed successfully. Click Finish, then restart your Mac. After restarting normally, the AMD GPU drivers are no longer loading — your Mac is fully patched.
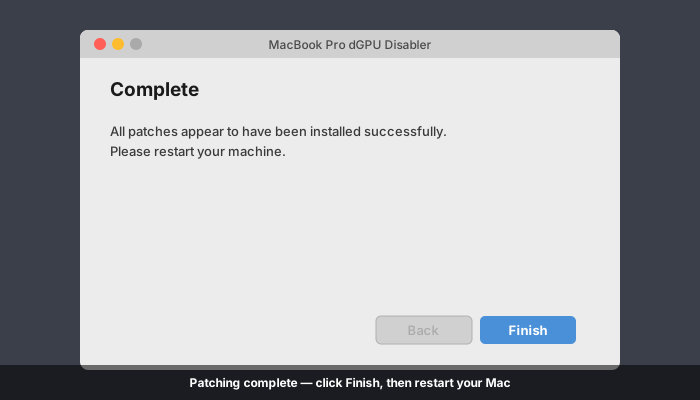 Patching complete — click Finish and restart
Verify Normal Boot
After restarting your Mac should boot directly to the login screen — no Safe Mode, no black screen, no restart loop. The AMD drivers are gone. Your Mac is running entirely on Intel HD Graphics.
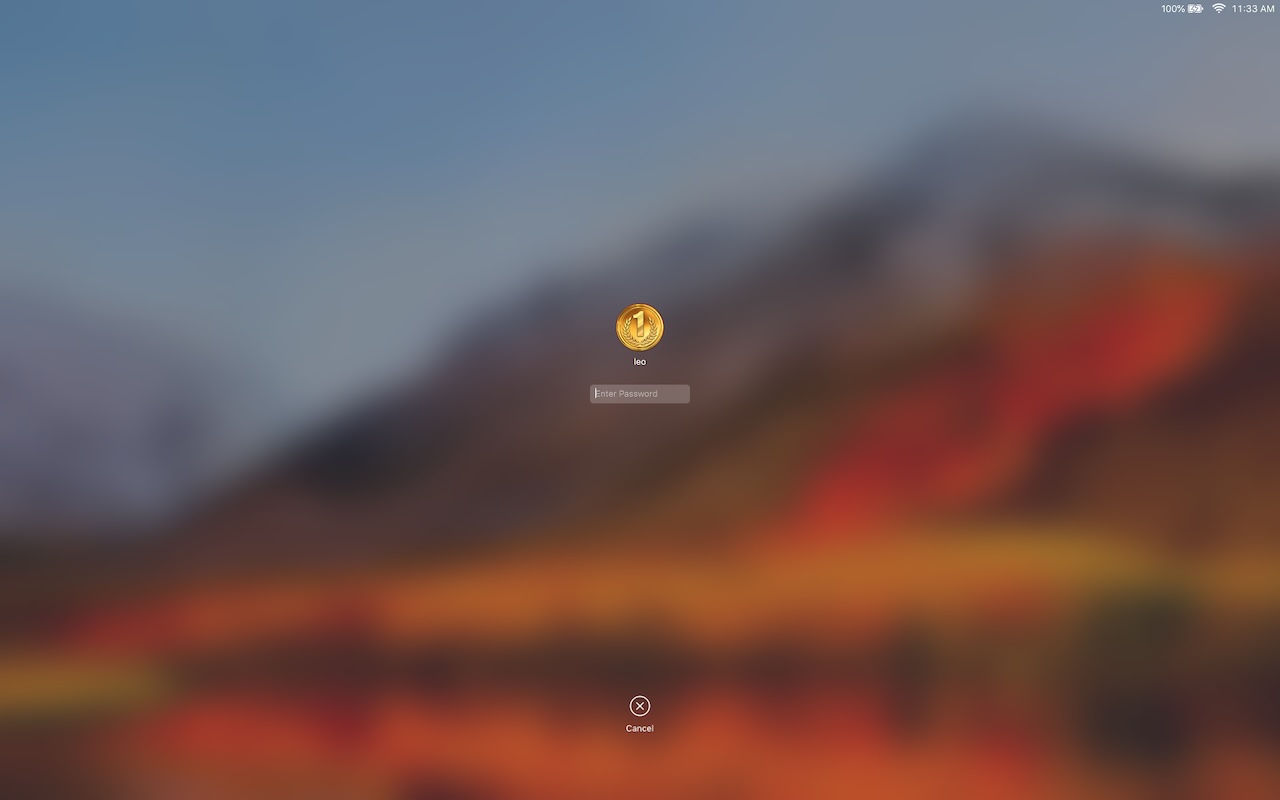 Normal boot to login screen — the fix is complete (screenshot coming soon)