Fix Your 2011 MacBook Pro GPU Failure — using MacGPUFix+
Your Mac still works. One automated boot from the MacGPUFix+ USB drive is all it takes to bring your screen back — permanently.
This guide is for MacBookPro8,2 (15-inch Early 2011) and MacBookPro8,3 (17-inch Late 2011) owners whose Mac won't display, is stuck in a restart loop, or has a black screen on normal boot. No technical knowledge or working screen is required.
The 2011 MacBook Pro AMD GPU failure has been known in the Mac community for years — but every existing fix required typing complex commands blindly into a Terminal. MacGPUFix+ makes the fix automatic. Your Mac gets a second life worth hundreds to thousands of dollars in avoided hardware repair or replacement costs.
Important: This guide covers the EFI fix — the firmware-level step that restores your display. It is a two-step process: the EFI patch (this guide) disables the AMD GPU in firmware; the macOS driver patch removes AMD drivers from your operating system for full stability. MacGPUFix+ future releases (coming soon) will automate both steps. For now, the macOS driver patch requires a manual approach documented at the end of this guide.
The Problem
You press the power button. Your Mac chimes. Then — nothing. A black screen, a distorted display, or a restart loop that never ends. You may have found it sometimes works after cooling down, or that it used to boot occasionally but now doesn't at all. Sound familiar?
This is the AMD GPU failure — one of the most widespread hardware defects Apple ever shipped. Several 2011 MacBook Pro models came with AMD Radeon HD 6490M or 6750M discrete graphics chips whose solder joints crack over time from heat cycling. Once the solder fails, the chip loses connection with the logic board — intermittently at first, then permanently.
⚠ Whether Safe Mode reliably restores the display on all affected models is still being validated. Share your result →
Affected Models
- MacBookPro8,2 — 15-inch Early 2011
- MacBookPro8,3 — 17-inch Late 2011
The 13-inch 2011 (MacBookPro8,1) has no discrete GPU and is not affected. MacGPUFix+ will safely abort if run on an unsupported model.
Why the Common "Fixes" Don't Work
If you've searched for a fix, you've likely seen suggestions to bake the logic board in an oven or reflow the GPU with a heat gun. These temporarily re-melt the cracked solder joints — some people report days or weeks of results. But the root cause — thermal stress from normal use — remains. The failure returns. Apple's own repair program replaced logic boards with the same design. Boards fixed in 2015 commonly failed again by 2018. They are delays, not fixes.
How MacGPUFix+ Fixes It
The underlying fix — writing a specific NVRAM EFI variable to tell the Mac's firmware to bypass the AMD GPU entirely — was discovered and documented by the Mac community, most notably in a long-running MacRumors forum thread with tens of thousands of replies. The knowledge existed. What was missing was a way for anyone to apply it without typing complex commands into a Terminal they couldn't see.
MacGPUFix+ packages that community-discovered fix into a bootable USB tool. Plug it in, boot from it, and it handles everything automatically — writing the gpu-power-prefs EFI variable to firmware, logging the result, and rebooting. No command line. No screen required. Repeatable every time.
Other approaches exist. The manual nvram command — the original community fix — requires typing a long hex string blindly into Single User Mode with no visual feedback. OpenCore Legacy Patcher (OCLP) also applies this fix as part of a much broader macOS patching process, but it requires a working screen, runs only on macOS, and involves hours of configuration. Neither option works without at least some technical knowledge and, in most cases, a visible display.
MacGPUFix+ applies the same underlying fix automatically — no screen required, no command line, no macOS dependency. The result is the same EFI variable, written correctly, in under two minutes. Whatever OS you plan to run next, the fix is already in place.
What Changes After the Fix
Before the fix, the GPU failure had already taken several things away from you. The fix restores your Mac and gives it a second life — with a clear picture of what that looks like.
A Second Life for Your Mac
Running on integrated Intel HD graphics, your Mac handles far more than most people expect:
- Web browsing, email, documents, cloud-based work — all fully functional
- Video calls, media playback, online learning — no issues
- All USB, Thunderbolt, and networking ports — unchanged
- Your existing macOS, applications, and all your files — nothing deleted
- A capable machine for students working with cloud-based documents and productivity tools
- An ideal environment for learning Linux on real hardware
What Was Already Lost
These limitations are not a result of the fix. They were lost when the GPU failed. The fix does not make them worse:
- External monitor support — HDMI and DisplayPort route through the AMD chip
- GPU-intensive workloads — 3D rendering and heavy video export
- Keyboard brightness keys — workaround: Brightness Slider app (free, App Store)
EFI Fix — MacGPUFix+ Step-by-Step Guide
You will need a USB drive with at least 4GB free and access to any working Mac for Step 1. The full process takes under 10 minutes.
Create the Recovery USB
On macOS: Paste the one-liner below into Terminal on any working Mac. The wizard guides you through every step — it explains each action and pauses before doing anything. Use CTRL+C to cancel at any time.
The wizard will take the following actions
- Will download the wizard script
- Will download the image file and the .sha256 encryption file, used to create the USB
- Will ask for admin password to begin writing data to the USB (macOS will prompt for the password)
/bin/bash -c "$(curl -fsSL https://macgpufixplus.com/get/get-macgpufixplus.sh)"
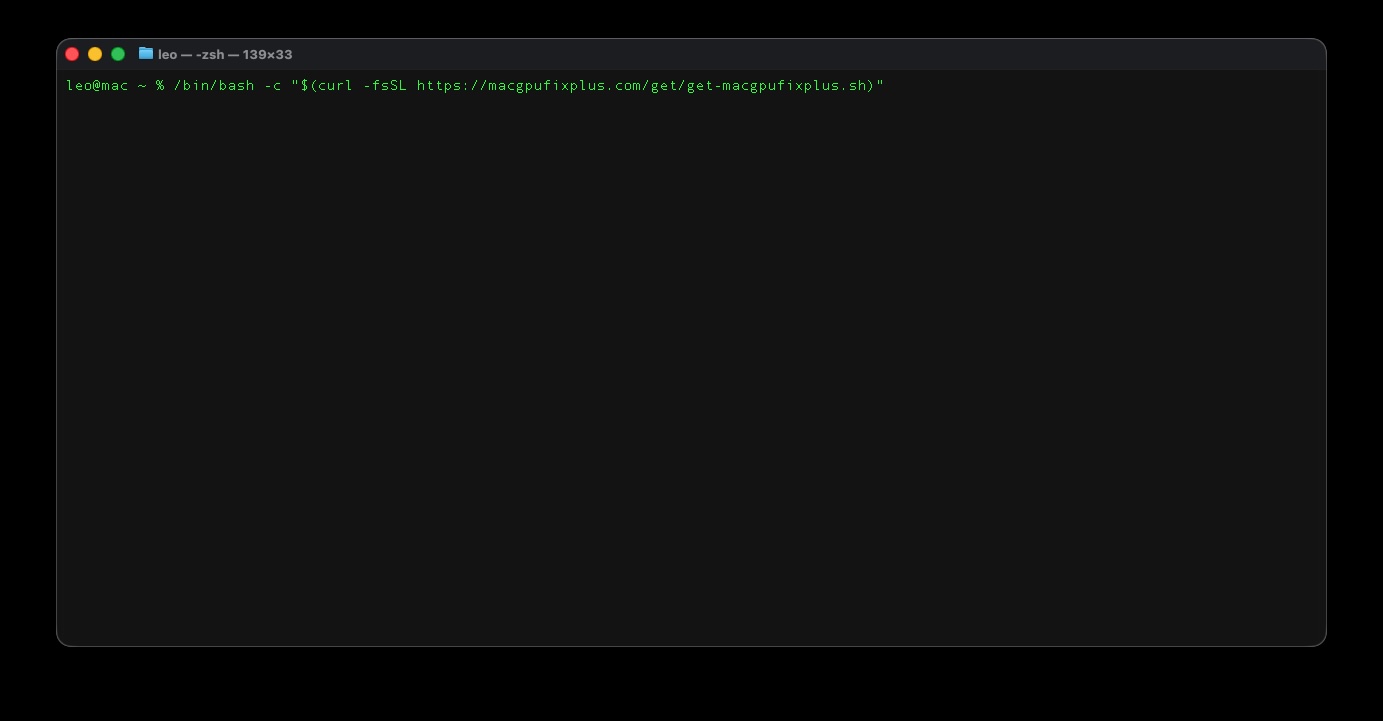 macOS Terminal — one-liner pasted, ready to run
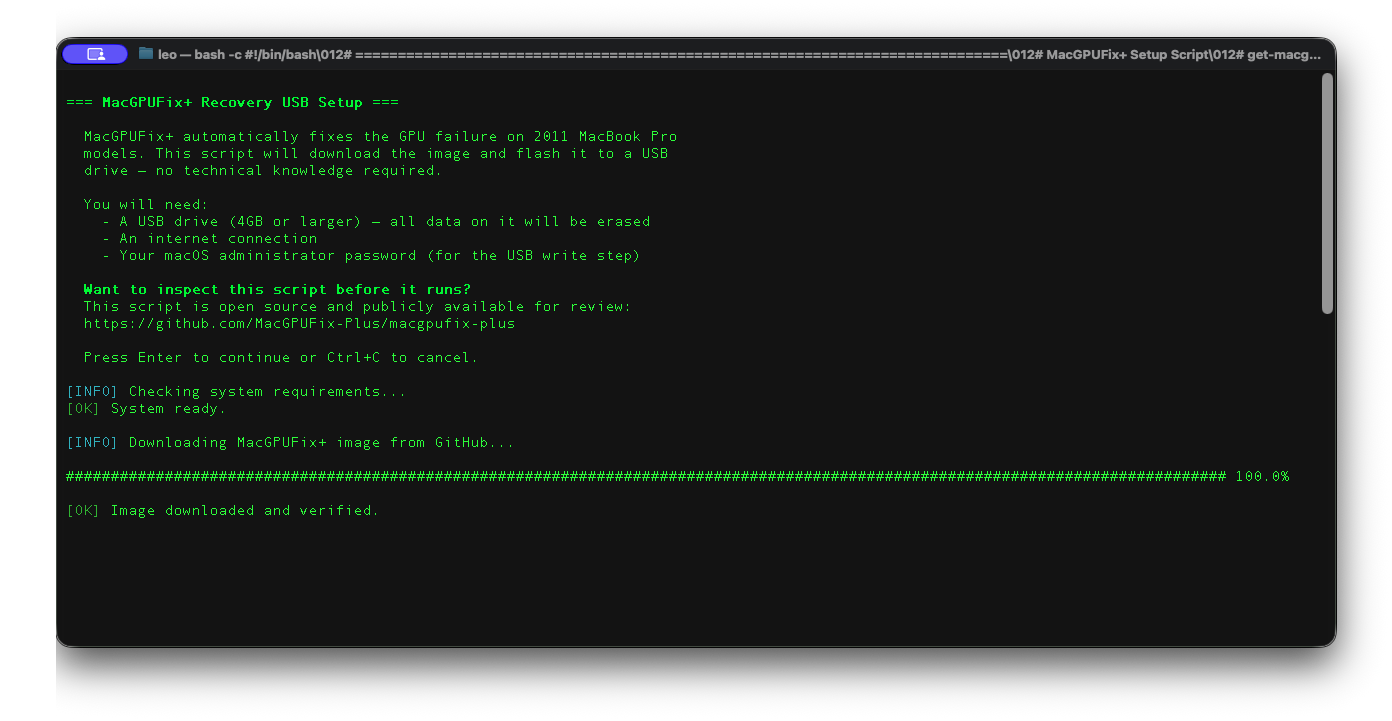 Terminal wizard — drive selection prompt
Requires: A USB drive with 4GB minimum. The script lists available drives and waits for your confirmation before writing anything.
On Windows or Linux: Use the Download page for manual USB creation with SHA256 verification.
Perform a PRAM Reset
This is a suggested step to help set a controlled state for your system. The purpose is to clear stale EFI variables and ensure a clean write using the MacGPUFix+ tool. You can skip this for now — it is not mandatory — but stale EFI data can prevent the fix from applying correctly. Revisit this step if you have issues getting MacGPUFix+ working.
Hint: See Step 5. Check the log for the status. A SKIPPED result may indicate a need to perform a PRAM reset before running again.
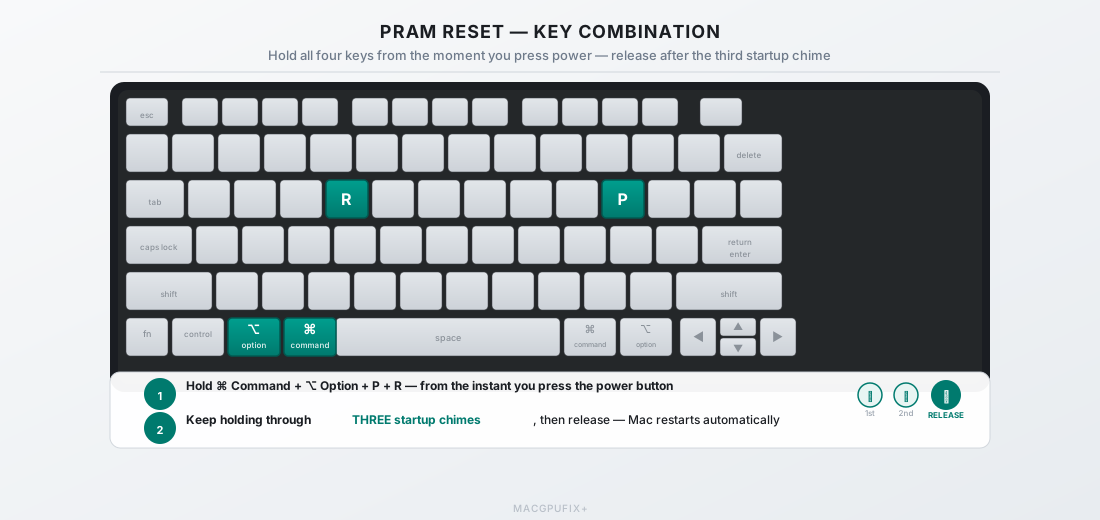 Tap to enlarge — hold all four keys from power-on through three chimes
Hold Command ⌘ + Option ⌥ + P + R from the moment you press power. Keep holding through three startup chimes, then release.
Boot from the USB Drive
Plug in the MacGPUFix+ USB. Press power and immediately hold Option ⌥ for a full 15 seconds. The boot picker is loading even if your screen shows nothing.
Tap to enlarge
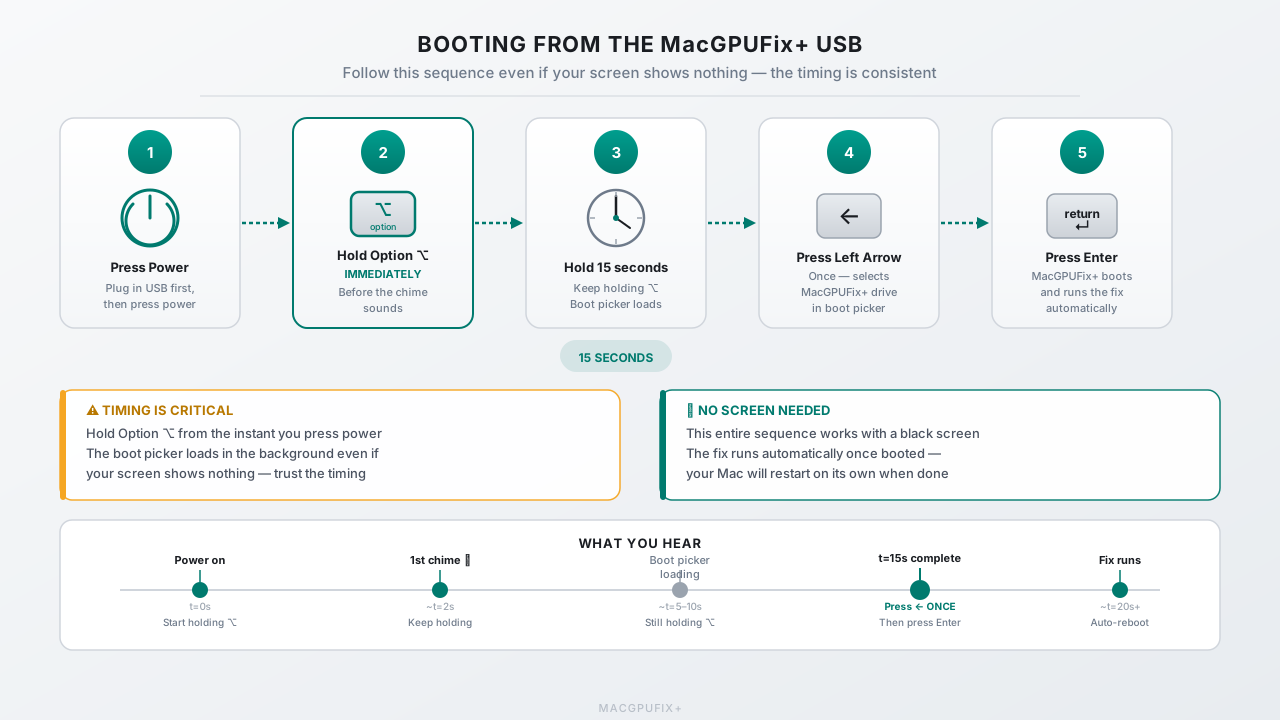 Full boot sequence with timing
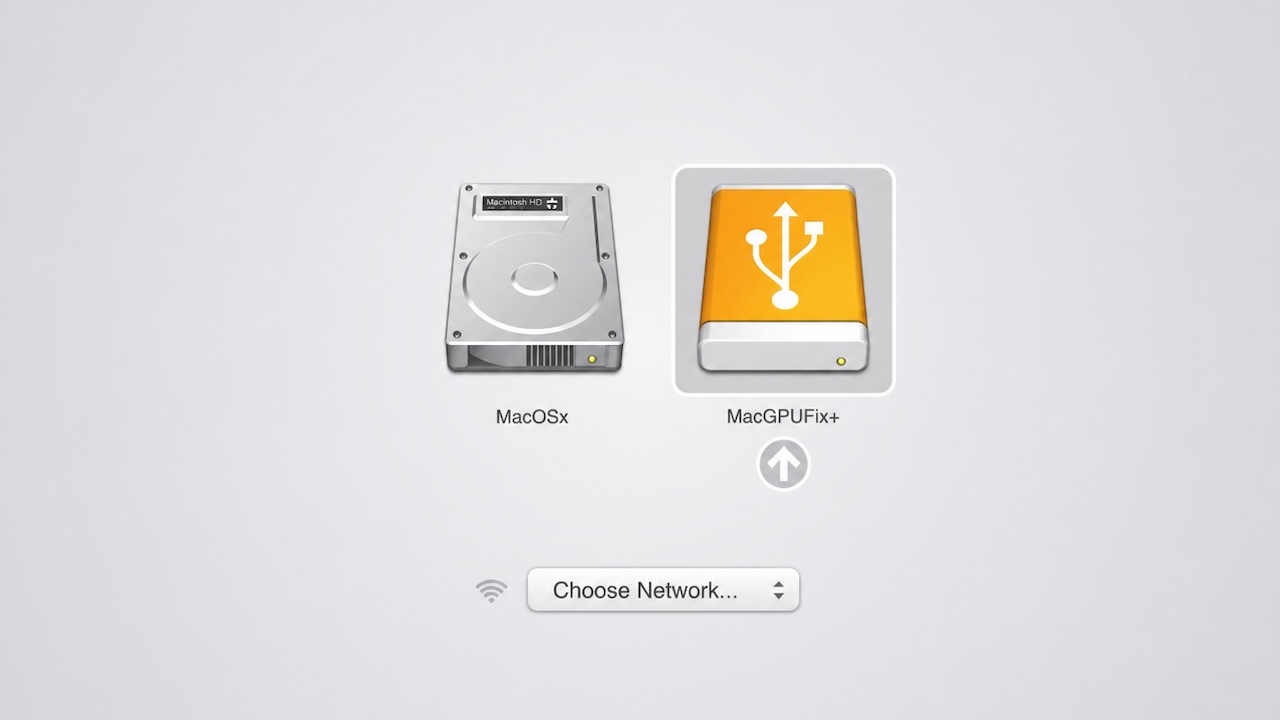 Visible Boot picker selecting MacGPUFix+
Press the Left Arrow key once to select MacGPUFix+. Press Enter. The fix runs automatically with no further input needed. (The visible boot picker image is to demonstrate what you are trying to do with the instructions for selecting the correct USB to load)
Hint - See step 5. Check your log to see if the USB executed and look for the status. No log may indicate the patcher did not run
Wait — It Runs Automatically
MacGPUFix+ boots into Alpine Linux entirely from RAM, writes the EFI variable to firmware, logs the result to the SCRIPTS partition on your USB, and reboots. The process takes under 60 seconds. Your Mac restarts on its own.
See all the steps and watch the fix in action — Watch the MacGPUFix+ USB Creator Wizard →
Nothing is written to your internal drive. Your OS, applications, and files are untouched.
Check the Log and Verify
After reboot, plug the USB into any working Mac. Open gpu-fix.log on the SCRIPTS partition:
- SUCCESS — EFI variable written. The fix is in place.
- SKIPPED — variable already existed. If your screen is back, you're done. If not, PRAM reset and run again.
- FAILED — EFI subsystem not accessible. PRAM reset and retry. Still failing? Open a GitHub issue with your log.
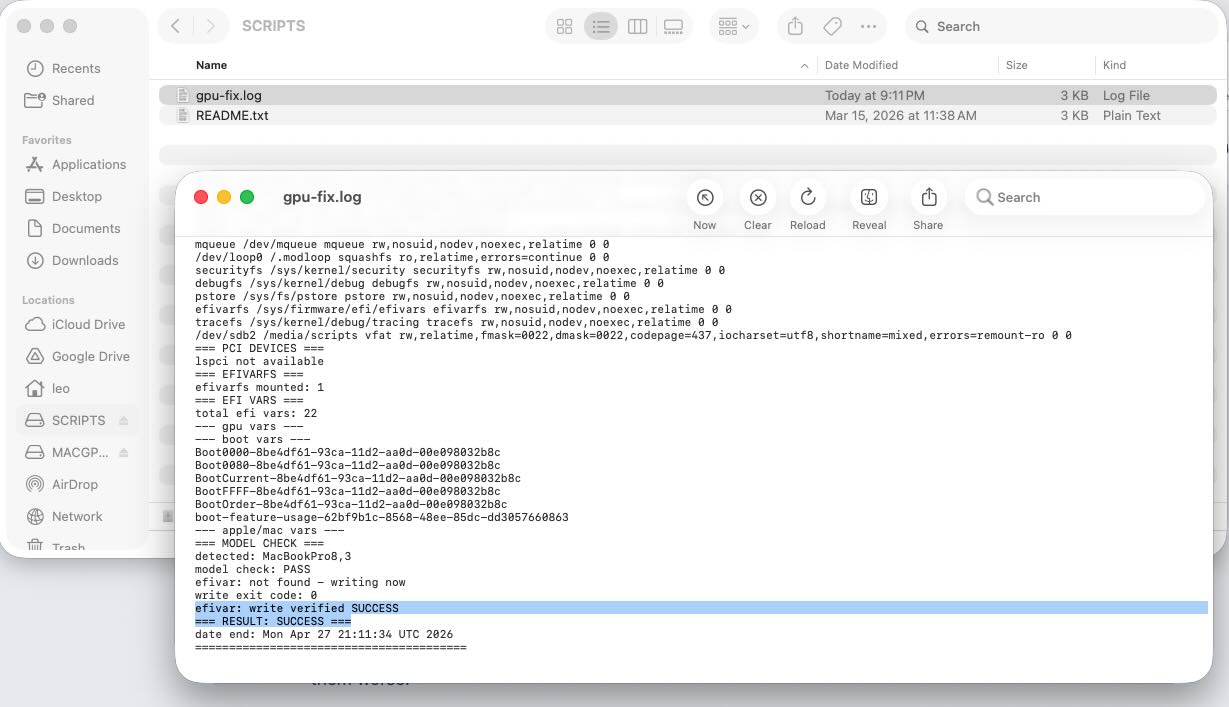 SCRIPTS partition — gpu-fix.log showing SUCCESS
More on every log result: See the FAQ →
After the Fix — What to Do Next
The EFI fix is complete and your screen should display correctly on reboot. But there is one important thing to understand before expecting full normal macOS boot.
macOS stores AMD GPU driver files (kexts) in the operating system. These load at startup, look for the AMD GPU, and find it disabled. This will explain the looping boot you may experience, or the freezing up of your device. Under load, macOS may become unstable as the AMD driver attempts to hand off to hardware (AMD GPU) that is no longer responding.
Until the os-specific driver patch is applied, the most reliable way to use your Mac immediately is Safe Mode. Safe mode is the quickest workaround to accessing your device's contents becasue Safe Mode skips looking for the AMD drivers, giving you a stable environment to back up files, run updates, or prepare for the next step.
The Fix Has Two Levels
The EFI fix you just applied stops the AMD GPU from initialising at firmware level. But macOS still loads AMD GPU driver files on every boot. Until those drivers are removed, normal boot may be unstable under load. There are two approaches you can choose from, depending on what you need right now.
Option A — Immediate Access via Safe Mode
Safe Mode forces macOS to skip the AMD drivers entirely. Your Mac boots, your screen works, and you can access your files and verify the system is stable — without any further steps.
To boot into Safe Mode:
- Press the power button.
- Immediately hold Shift ⇧.
- Release when the Apple logo and progress bar appear.
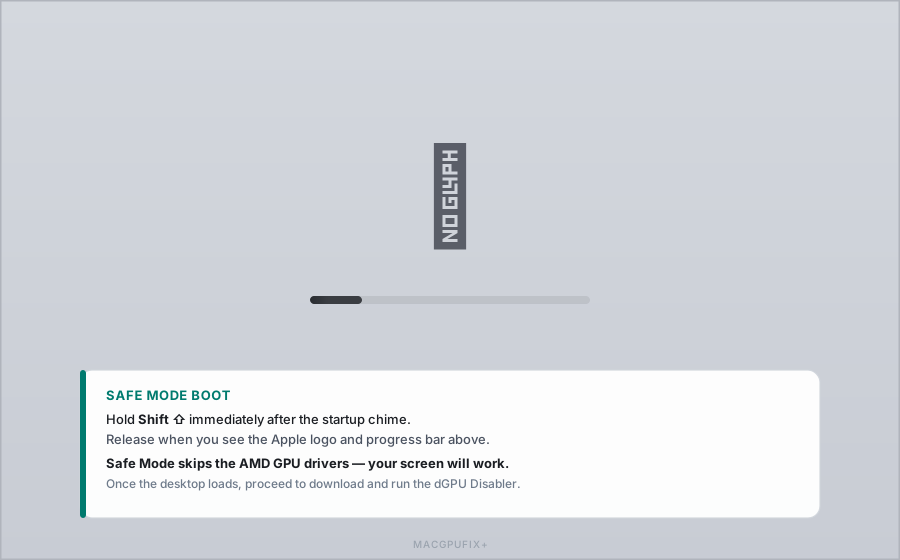 Hold Shift after the chime — release at the Apple logo
Option B — Remove the AMD Drivers Manually
Removing the AMD driver files from macOS gives you a fully stable normal boot — no Safe Mode, no restrictions. This is the current manual approach and takes 20–30 minutes involving Recovery Mode and Terminal. MacGPUFix+ future releases will automate this process entirely — the manual guide will remain available as a reference.
Manual Driver Removal Guide →